THE BLOG
Hello! I'm Amy and I've been running my microgreens farm, Nell's Urban Greens, from my garden grow house in Leeds, UK since 2017.
Over the years I've learnt a lot about growing, selling, making enough money to pay myself a regular salary, and building a business that works around real life.
This blog is where I share the practical advice, lessons and valuable insights I've picked up along the way.

Want to get started
straight away?
Access my Free Training here
If you germinate your microgreens seeds well, you’re most of the way there to growing a consistent, abundant and stress-free crop. Exactly what you need when you’re growing microgreens commercially! So, it’s important to get this bit right – which is why I’m dedicating a whole blog article to germination this week.
If you don’t already know, germination just describes the process of a dormant seed springing into life by starting to split and grow its roots and shoots for the first time. It’s magical!
As commercial microgreens growers, we ideally need all of our crop shoots to grow at the same rate as each other so when it comes to harvest time, they’ll all be the same height resulting in a consistent size and be much easier and faster to cut on harvest day. This stuff doesn’t matter so much when you’re growing one or two trays, but when you get to 50 trays+ a week, harvest speed and accuracy matters!
Here are 5 practical ways you can maximise your chance of getting perfect germinating seeds every time:
1. Start with great quality seed
Reputable microgreens seed suppliers will have sent their seed batches off for germination tests and these come back as a percentage. You want these to be as close to 100% as possible. Unless suppliers are willing to tell you, you won’t be able to find out that percentage. So the second best option is to buy from recommended, tried and tested suppliers. Luckily for us now, we have a number of great microgreens seed suppliers in the UK. I recommend: Grow Sow Greener, Aconbury Sprouts (for your sunflower seeds!) and Premier Seeds Direct.
If you join our Farm Microgreens UK Facebook community, then you can also ask in there for current seed batch recommendations 🙂
Top tip – If you ever receive seed that doesn’t germinate well, then get back to your supplier about it and ask for a refund or to try a different seed batch.
2. Hydrate your seed well
The germination process is kick-started when seed absorbs enough water. To achieve this, larger seeds should be soaked overnight, such as pea, sunflower, nasturtium, corn, beetroot, and chard. Seeds smaller than these can just be sprayed well with water on the grow medium after sowing.
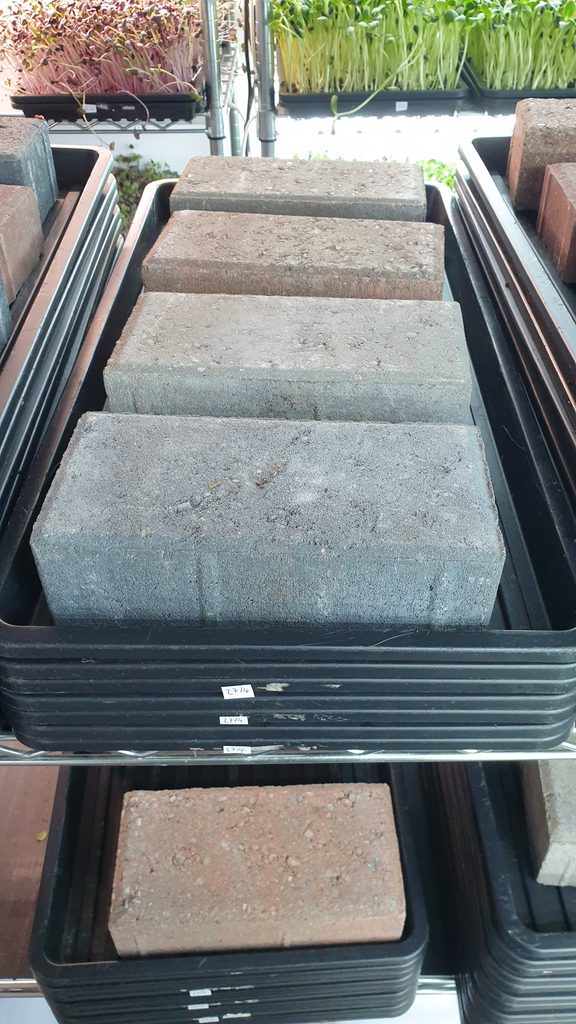
3. Stack and weight your trays evenly
This will help force even germination – see the photo below of my excessive use of block pavers on my germination shelves!
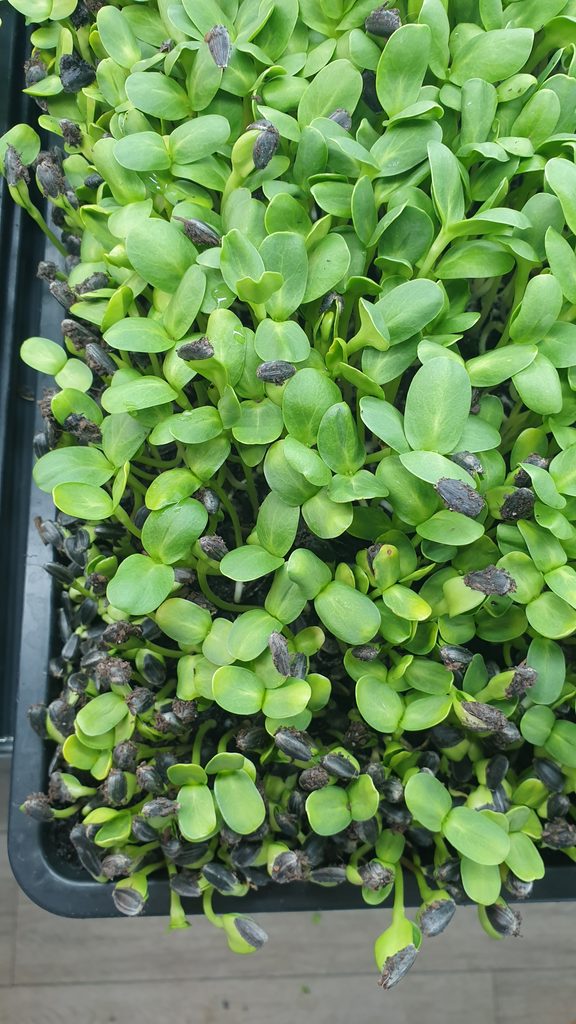
4. Don’t let your seed dry out
Particularly during the hotter months, check your seed daily whilst it’s in germination. Make sure no part of the tray has dried out. This tends to happen around the edges first, so just give them a quick spray of water each day if you think this is happening. See the photo below to see what my sunflower shoots looked like when the seed around the edge of my tray in germination dried out for too long a few years ago! Uneven germination AND lots of seed hulls still clinging on. Nightmare.
5. Keep germination temperatures warm enough
Another cause of uneven germination, and potential mould problems, particularly during the winter months, is your seed not being warm enough. Your seeds will take longer to germinate in cooler temperatures and are more likely to do so unevenly. Also, you want to aim to get them out of germination as quickly as is possible for each crop. Conditions in your germination stack are usually warm and moist which can make mould problems more likely.
Temperatures for germinating microgreens seeds
Ideally, you want your grow room to be at least 18C for germination. 20 – 22C is perfect. If you’re growing your microgreens in cooler conditions during the winter, like I did when I used to grow all my crops in our conservatory, a top tip is to move your germinating trays into a warmer space in your house just until they’ve germinated. Our kitchen was heated warmer than our conservatory over the winter, so I moved my stacked germinating trays into there, then when they were ready, they’d go back out onto the grow racks.
At the other end of the spectrum, it’s useful to know that as seed are germinating, the energy this requires also produces heat. So during the hotter months, regularly check your seeds in germination to make sure no mould is growing. If you spot any mould, remove the affected seed straight away and keep a close eye on the rest of the tray.

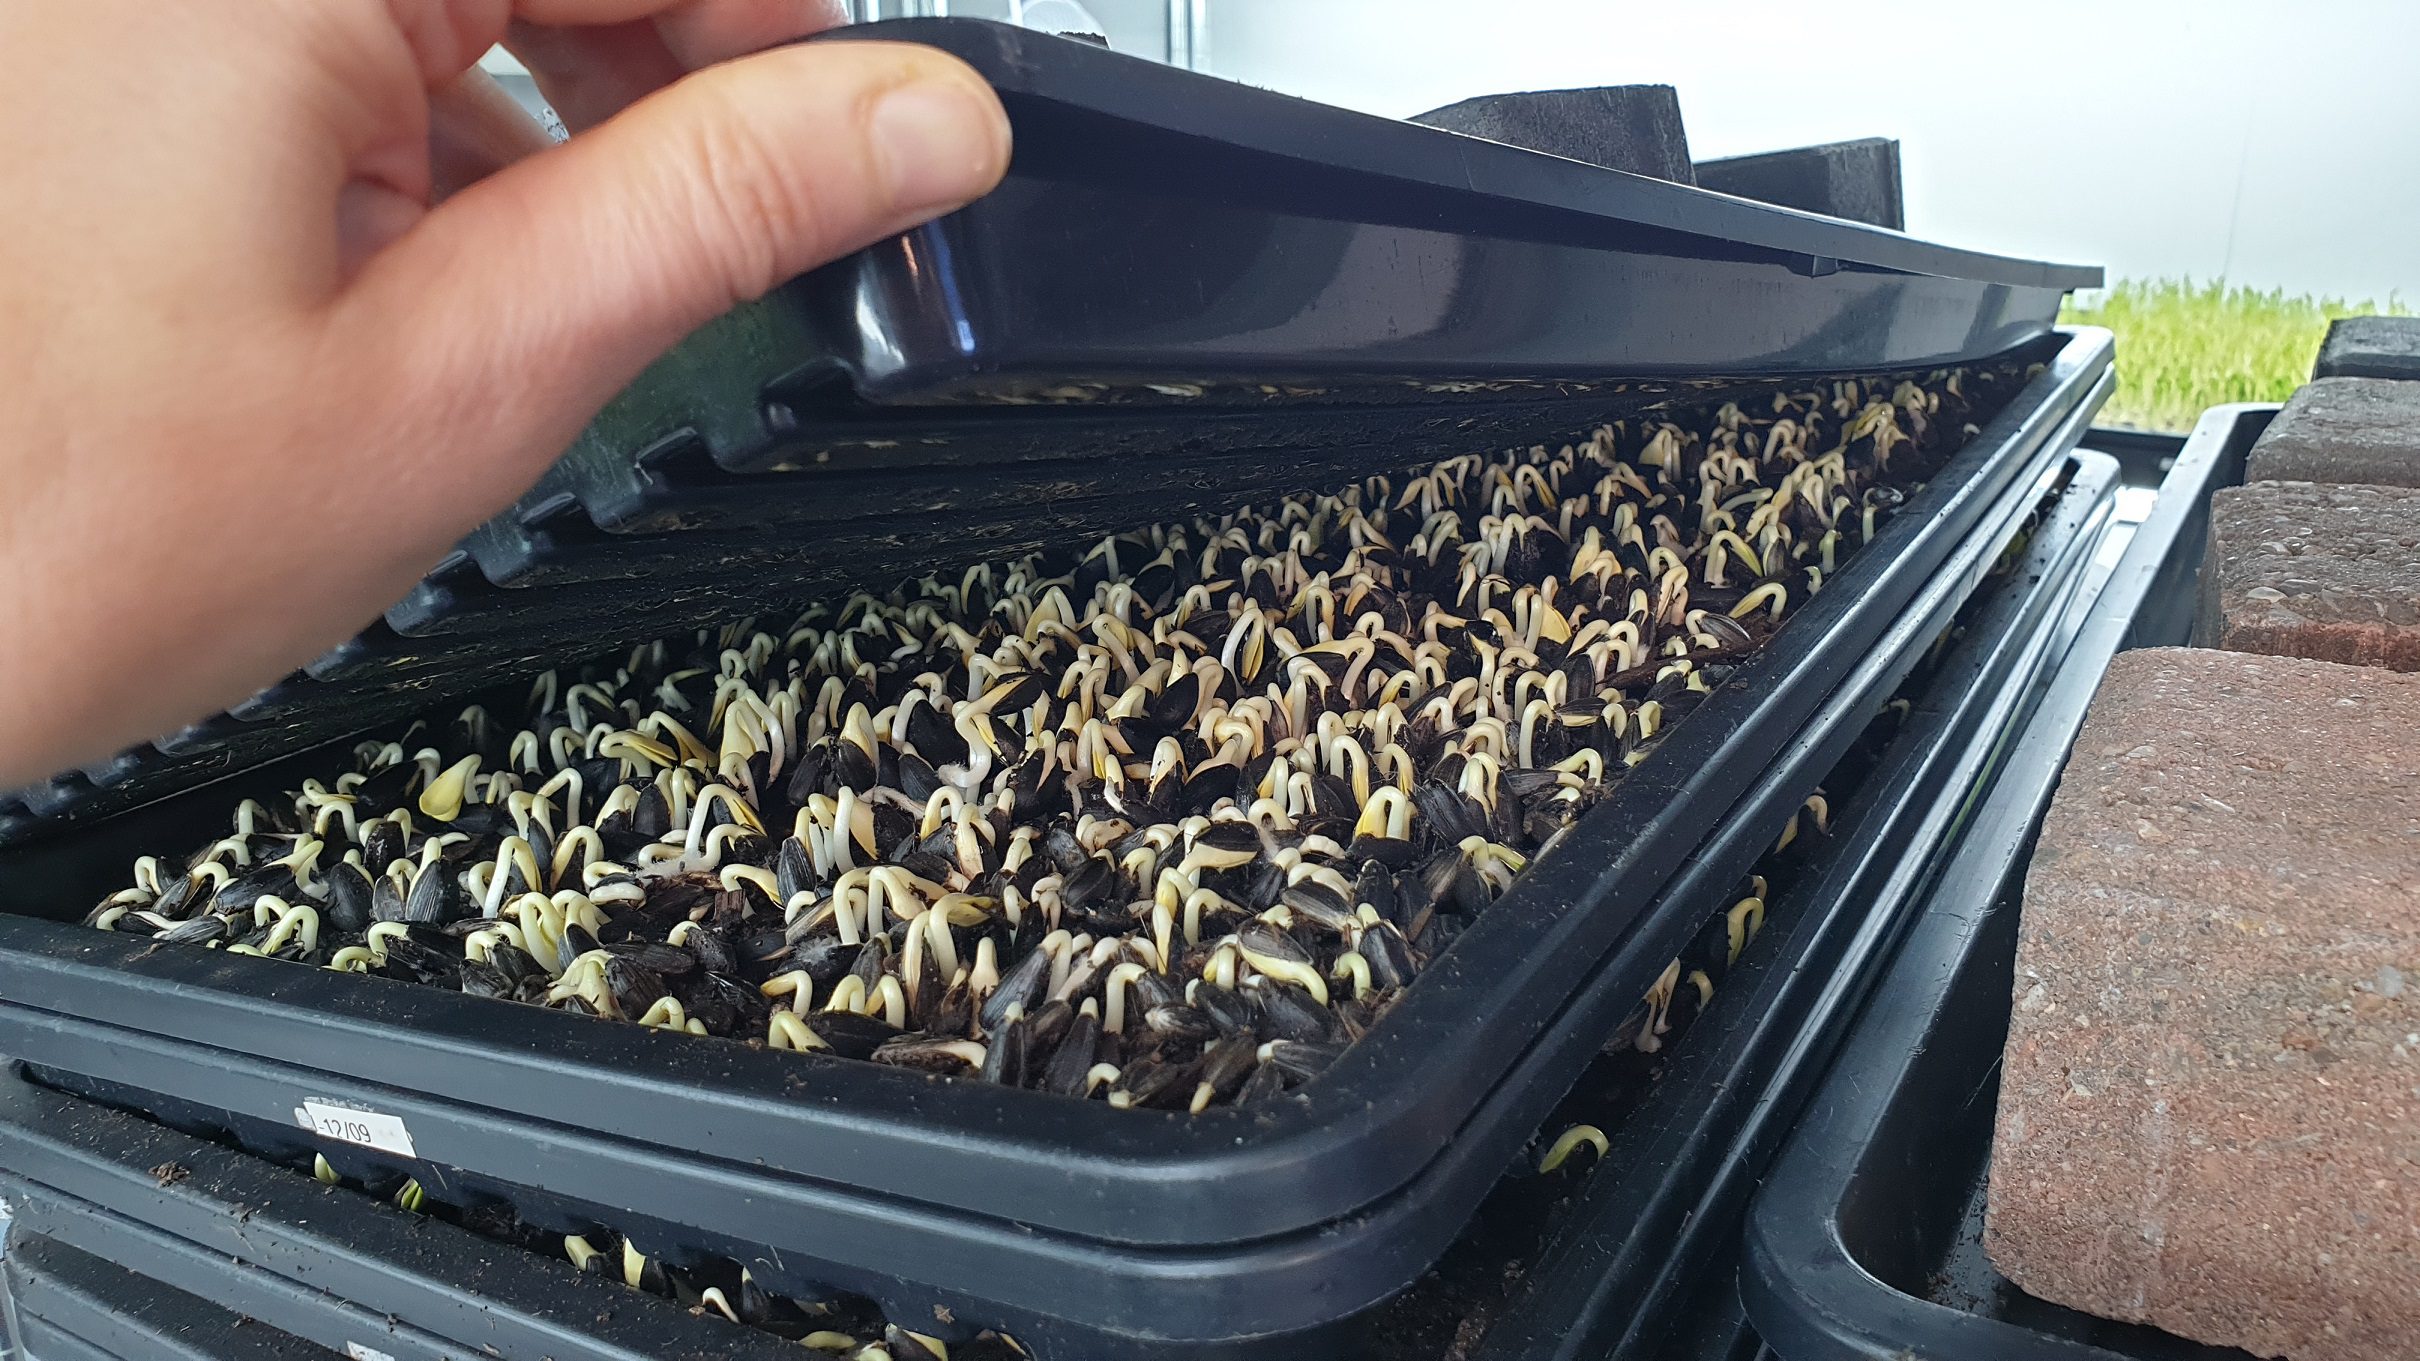
After using quality seed, stacking in warm conditions, keeping your seeds and grow medium well hydrated and evenly weighted, your trays of seed will soon be ready to take out of germination and left to grow on your shelving under lights. You’ll know they’re ready when (ideally!) every seed has grown a little shoot and are around 1 – 2 cm tall depending on variety. The trays below show perfect germination and make me *very* happy when I take their covers off and see them looking like this. This is what you want!
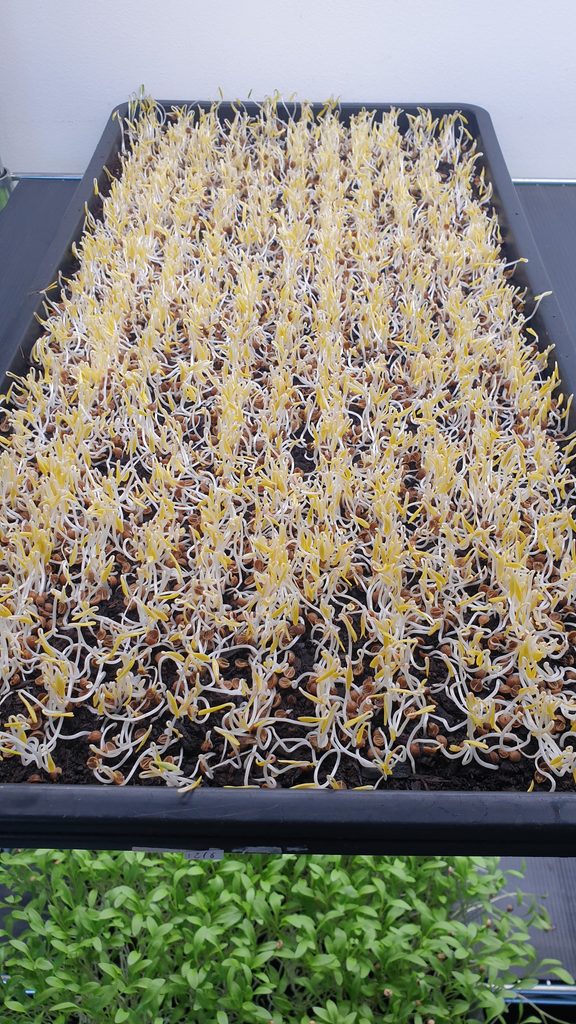
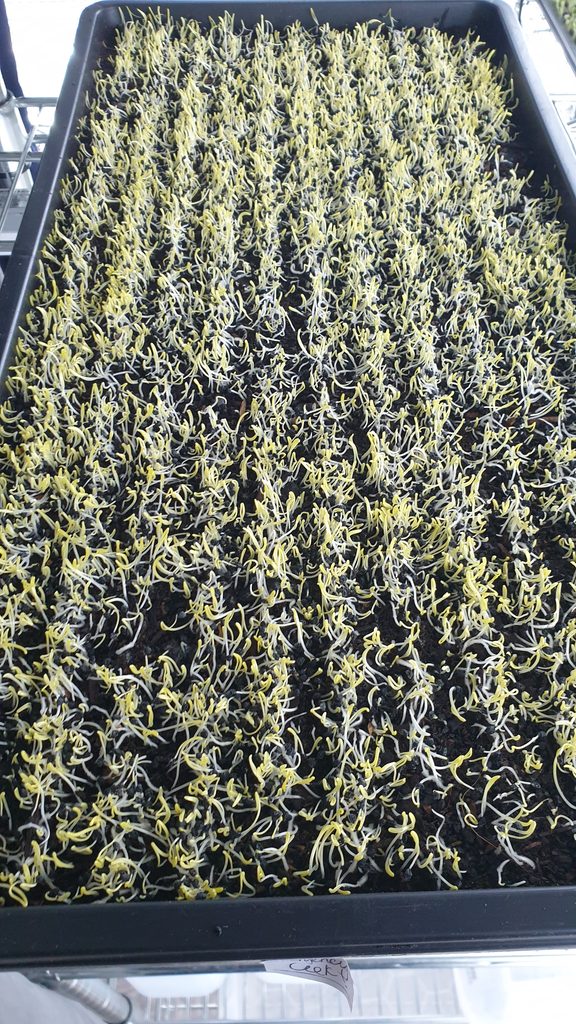
Micro Coriander splits (left) – fully germinated in 7 days
Micro Leek (right) – fully germinated in 6 days
Ultimately, it’s not the end of the world if your microgreens seeds don’t germinate perfectly every time. Mine don’t always, and I’ve been growing continuously for years! You’ll hopefully still get a good harvest from them, although your yields may be a little lower than optimum for that tray. Follow the best practices I’ve shared here and you’ll give your seeds the best possible chance of germinating evenly and minimise any problems along the way.
A well germinated tray of microgreens seed will, more often than not, go on to produce an excellent crop for you. And there’s no better feeling than that!
Want to grow microgreens commercially?
Getting consistent results from your crops is just one part of running a successful microgreens business.
Inside my UK Microgreens Business Course, I teach you the growing methods I use at my own farm, alongside everything else you need to professionally set up, start selling and build your microgreens business here in the UK.
Find out more about the UK Microgreens Business Course →
Amy Wright
October 13, 2026
Germinating Microgreens: How to Get Consistent Results