THE BLOG
Hello! I'm Amy and I've been running my microgreens farm, Nell's Urban Greens, from my garden grow house in Leeds, UK since 2017.
Over the years I've learnt a lot about growing, selling, making enough money to pay myself a regular salary, and building a business that works around real life.
This blog is where I share the practical advice, lessons and valuable insights I've picked up along the way.

Want to get started
straight away?
Access my Free Training here
One of the many brilliant reasons to run your own microgreens business is that you can grow and sell fresh food all year round. I always take orders right up until Christmas week at my farm (micros are great on festive canapes!), then start back in early January. Fresh, nutritious food for your customers during the cold season AND a consistent year-round income for you. So I highly recommend you do this for your business.
However, the UK seasonal changes do affect indoor microgreens growing. Unless you have a large facility that uses buckets loads of electricity to heat and cool your growing space to the exact same temperature 24/7, year-round, then a change in seasonal temperature will affect your grows.
I’m writing this post today because, firstly, it’s the end of October in the UK (the time of year when temperatures notably drop from those of a month or so ago) and also, if you’re new to microgreens farming it’s always useful to know what to expect with a change in season. It definitely surprised me during my first winter!

Here are 7 key points to remember when running your microgreens farm during the winter months:
Firstly, lower temperatures, followed by declining light levels are the two main environmental factors that will affect your microgreens growing during the autumn and winter months and these are what you need to think about and focus on in your own grow space. Lighting wise, just use low energy LED lights on your shelves. We need to address temperature more though.
1. Where to grow your microgreens during the winter (from October onward in the UK).
The short answer is – somewhere warm! Most of us grow microgreens indoors all year round, which can benefit from the central heating being on anyway in the winter if you’re growing in your house. Some grow outside in greenhouses, poly tunnels or out-buildings during the milder seasons of spring and summer, which is great and very do-able. However, unless you have a heated, and well-insulated outdoor space, I wouldn’t recommend growing microgreens commercially outside during the winter in the UK (from around October to April).
In lower temperatures (sub 15C), your microgreens will still grow, but they will slow right down and you’ll see many more inconsistencies with the growth quality and grow cycle times. A nightmare if you’re growing them to regularly sell to customers.
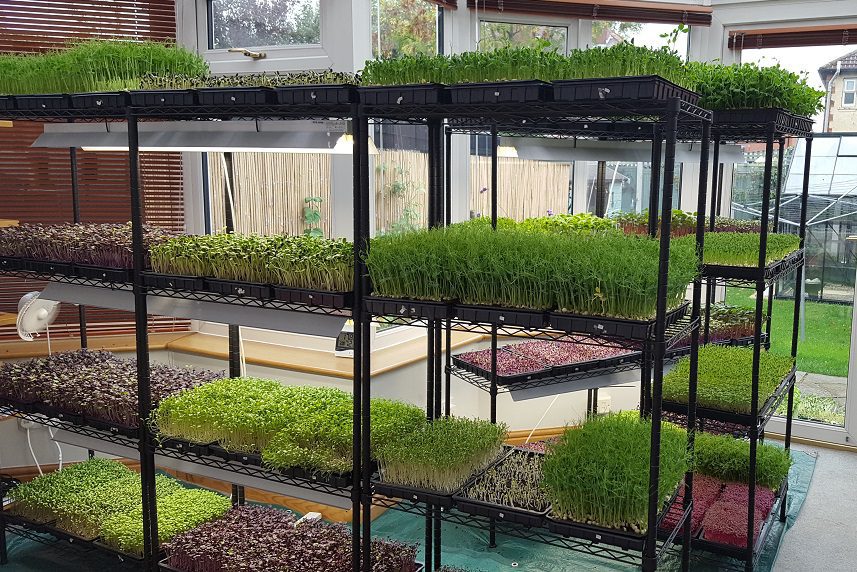
My indoor grow room 2017 – 2020 at Nell’s Urban Greens. The radiators warmed it during the day when needed, as did a dehumidifier.
2. How warm does it need to be?
The more consistent you can get your temperatures in your growing space, the more consistently your microgreens will grow. This is particularly important when you’re growing commercially, as you will have deadlines (harvest and delivery days) and will need to know exactly how long the grow cycle is for each crop in your own grow room.
An ideal temperature is 22 C. The majority of crops love this temperature and you can turn them around fast when it’s this warm. In reality, most houses/growing spaces aren’t this warm during the winter and that’s OK. You’ll just need to work out the grow times for whatever your temperatures are. I’d recommend trying to increase your grow room temperature though if it doesn’t regularly climb over 18 C during the day. During the winter, my Grow House tends to be 17C early morning, then can creep up to 20 – 21C during the day, just with the waste heat from the dehumidifier, and I can keep my grows consistent at this.
However, I ran my farm commercially for the first 3 years in the conservatory at the back of our house (see above). So there was lots of glass – great for natural light, not so great for keeping temperatures consistent. I didn’t heat it during the night (to save on energy) so in winter, temps fluctuated from 3C over-night, to 30C during the day when the sun came out! Not ideal, but I made it work. Kind of. I had to keep tweaking my grow cycles to fit in with the changing weather, but it definitely enabled me to establish my business and continually grow it during this time.
What I want you to remember:
➤ There are ideal conditions for growing microgreens commercially, but it’s still doable without perfect conditions too, especially if you’re just starting out and want to keep your start up and running costs to a minimum.
➤ Don’t let small variations in temperature and humidity worry you too much. If you don’t overfill your grow room to bursting, and you have plenty of air flow in there, the greens can take it. And the more growing experience you get in your space, the more you’ll know how low and high you can go to maintain your grow cycle lengths and quality of your crops.
3. Conditions for germinating your seed during the winter
Getting the conditions right for germinating your microgreens seeds is pretty important – and more so in the winter months. (I wrote about this topic in my last blog post – read more about it here.)
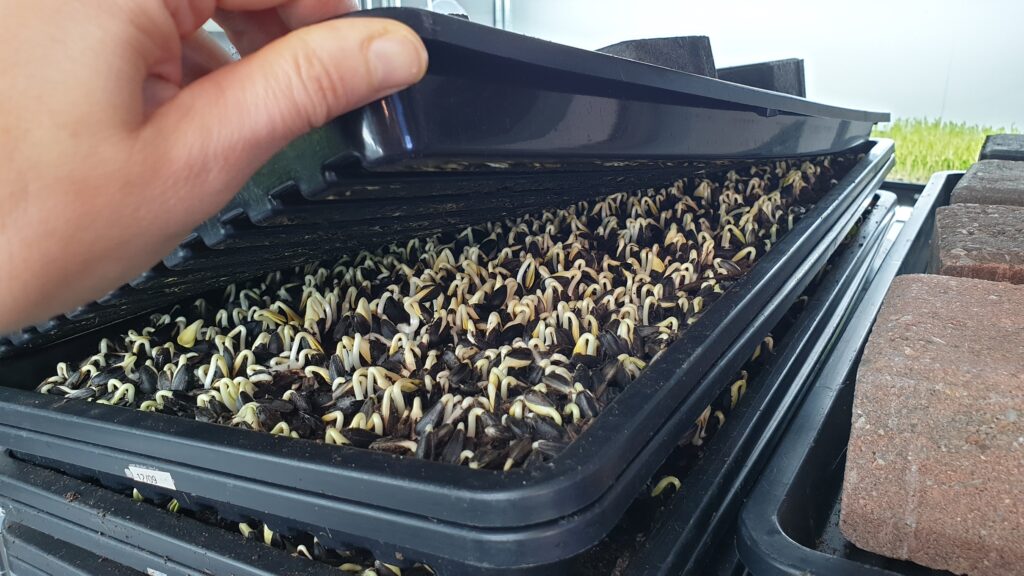
Your aim is for every seed in your tray to start germinating at the same time. That way, they should all grow at the same rate and then be much quicker and easier to harvest if they’re all at the same length on harvest day. If your grow room gets cold overnight (sub 17 C), I suggest finding a warmer place for germinating. This might be a smaller room in your house, different to your grow room. Germinating seeds definitely need the warmth. I used to germinate mine in a kitchen cupboard because I didn’t have any other space to stack a load of grow trays in the early days!
Be careful not to over-heat them though either – this can lead to excessive mould growth, your grow medium drying out quickly and seeds dying off. So don’t put them on radiators! And be careful if choosing to use heat mats for this process.
4. Insulation – the energy saving essential!
Insulate, insulate, insulate! One of the most effective ways of spending any cash and effort in your business at the beginning (or at any point if you haven’t done it already), is focusing on making your grow room as well-insulated as possible. With high energy prices in the UK, the last thing you want is to be paying for heat that is just getting lost to the outside instead of being used to grow your plants. Fill any gaps, consider an extra insulation layer on your walls, anything you can do to stop heat escaping during the colder months will be time and money well spent.
5. Humidity
As with any time of the year, the humidity of your grow room needs to be controlled somewhat. Growing lots of plants in the same space, and closely together, will significantly raise the humidity in the room. If the humidity gets too high, water droplets will form on the canopy of your greens, weighing them down and eventually turning them to mush if they can’t get rid of it. Warm, humid conditions will also speed up any mould growth in your trays and regular, excessively high humidities can damage walls and furnishings in the room – not great anywhere, but especially in your house!
Control this by using a dehumidifier. One unit should be enough in a small space (I use two in my 6m x 3m grow room for 80 trays/week) and running a dehumidifier also has the added benefit of emitting heat as a waste product – ideal to help warm chilly grow rooms in the winter! Realising this myself was a game changer when I moved into my current grow room. I made sure that it was very well insulated and I rarely need to put the heating on. The dehumidifiers have always heated it sufficiently all year round (9 winters in) and running both of them uses half the electricity of the underfloor heating system!
There’s no need to get overly obsessed with humidity levels, but around 50 – 60% is a good aim. The more crops you have in the space, the more you’ll need to control the humidity. You can buy a cheap hygrometer and thermometer-in-one online to keep your eye on these too parameters.
And just remember, as a rule of thumb – if you feel comfortable in your grow room, then so will your plants! If you walk in there and it feels like Leeds’ Tropical World, you’ll need to bring that humidity down!
6. Air Flow
Again, as with any time of year – keep air flowing through your growing space using fans. Not necessarily on the end of every grow shelf, but one or two oscillating floor fans should be enough to keep that air moving through your room.
If air is moving, any mould spores are less likely to settle and grow in your trays, particularly during the germination stage. Good airflow also aids efficient plant transpiration.
7. Using fridges during the winter
A final word on fridges – ensure they’re working properly and don’t end up freezing your harvested microgreens when temperatures start to fall outside! I used to use a fridge in our non-insulated outside garage to store my microgreens in before delivery and they froze to mush one night!
If you’re setting a temperature, 5C is sufficient for microgreens refrigeration. You can use a fridge thermometer to keep this in check.
And my last top tip for this week – don’t place your punnets of harvested microgreens too close to the back of the fridge. Again, they might freeze to mush. Advise your chefs about this too!
Now go hunker down, keep you and your plants warm and enjoy growing, selling and eating your fresh microgreens all winter long!
Amy Wright
October 26, 2026
Growing Microgreens Commercially Through the Winter in the UK